
Set Up Your New Obsidian Vault for Peak Productivity
Optimize your new Obsidian vault by configuring essential settings like keyboard shortcuts, themes, bookmarks, and plugins for a more efficient and personalized workflow.
Starting a new Obsidian vault is an exciting step towards organizing your thoughts and knowledge. To ensure you hit the ground running, it's beneficial to configure some essential settings right from the start. This guide will walk you through foundational changes that streamline your workflow, making your vault more efficient, visually appealing, and tailored to your needs from day one. By investing a few minutes in this initial setup, you'll create a consistent and productive environment across all your Obsidian vaults, helping you focus on your content rather than constant configuration.
What You'll Accomplish
Upon completing this guide, you will have:
- Customized keyboard shortcuts for faster navigation and editing.
- Applied a theme to enhance your vault's visual appeal and usability.
- Set up crucial bookmarks for instant access to frequently used notes.
- Installed a curated set of plugins to boost functionality without sacrificing performance.
Prerequisites
Before you begin, make sure you have:
- Obsidian installed on your device (Windows, macOS, Linux, Android, or iOS).
- A basic understanding of how to create and open an Obsidian vault.
- An active internet connection to browse and install themes and community plugins.
Step 1: Configure Essential Keyboard Shortcuts
Optimizing your keyboard shortcuts is the quickest way to speed up your interaction with Obsidian, reducing your reliance on the mouse and keeping you in the flow of writing.
- Open Settings: In your Obsidian vault, click the gear icon (Settings) in the bottom-left corner.
- Navigate to Hotkeys: In the Settings menu, select "Hotkeys" from the sidebar.
- Adjust Existing Hotkeys (Optional): Review the default hotkeys. Obsidian provides many useful shortcuts, but you can change them to suit your preferences.
- Add Custom Hotkeys: Focus on actions you perform frequently. Here are some highly recommended shortcuts:
- Command Palette (Ctrl + P or Cmd + P): This is your central hub for executing any command by name. Ensure it's easily accessible.
- Quick Switcher (Ctrl + O or Cmd + O): Rapidly jump between notes without using the sidebar.
- Toggle Edit/Reading Mode (Ctrl + E or Cmd + E): Seamlessly switch between writing and reviewing your notes.
- Global Search (Ctrl + Shift + F or Cmd + Shift + F): Search across your entire vault quickly.
- Insert Markdown Link (Ctrl + K or Cmd + K): Automate the process of adding hyperlinks, saving manual syntax typing.
- Open Link in New Tab (Ctrl + Click or Cmd + Click): When clicking an internal link, this prevents your current note from being replaced, keeping your workspace intact.
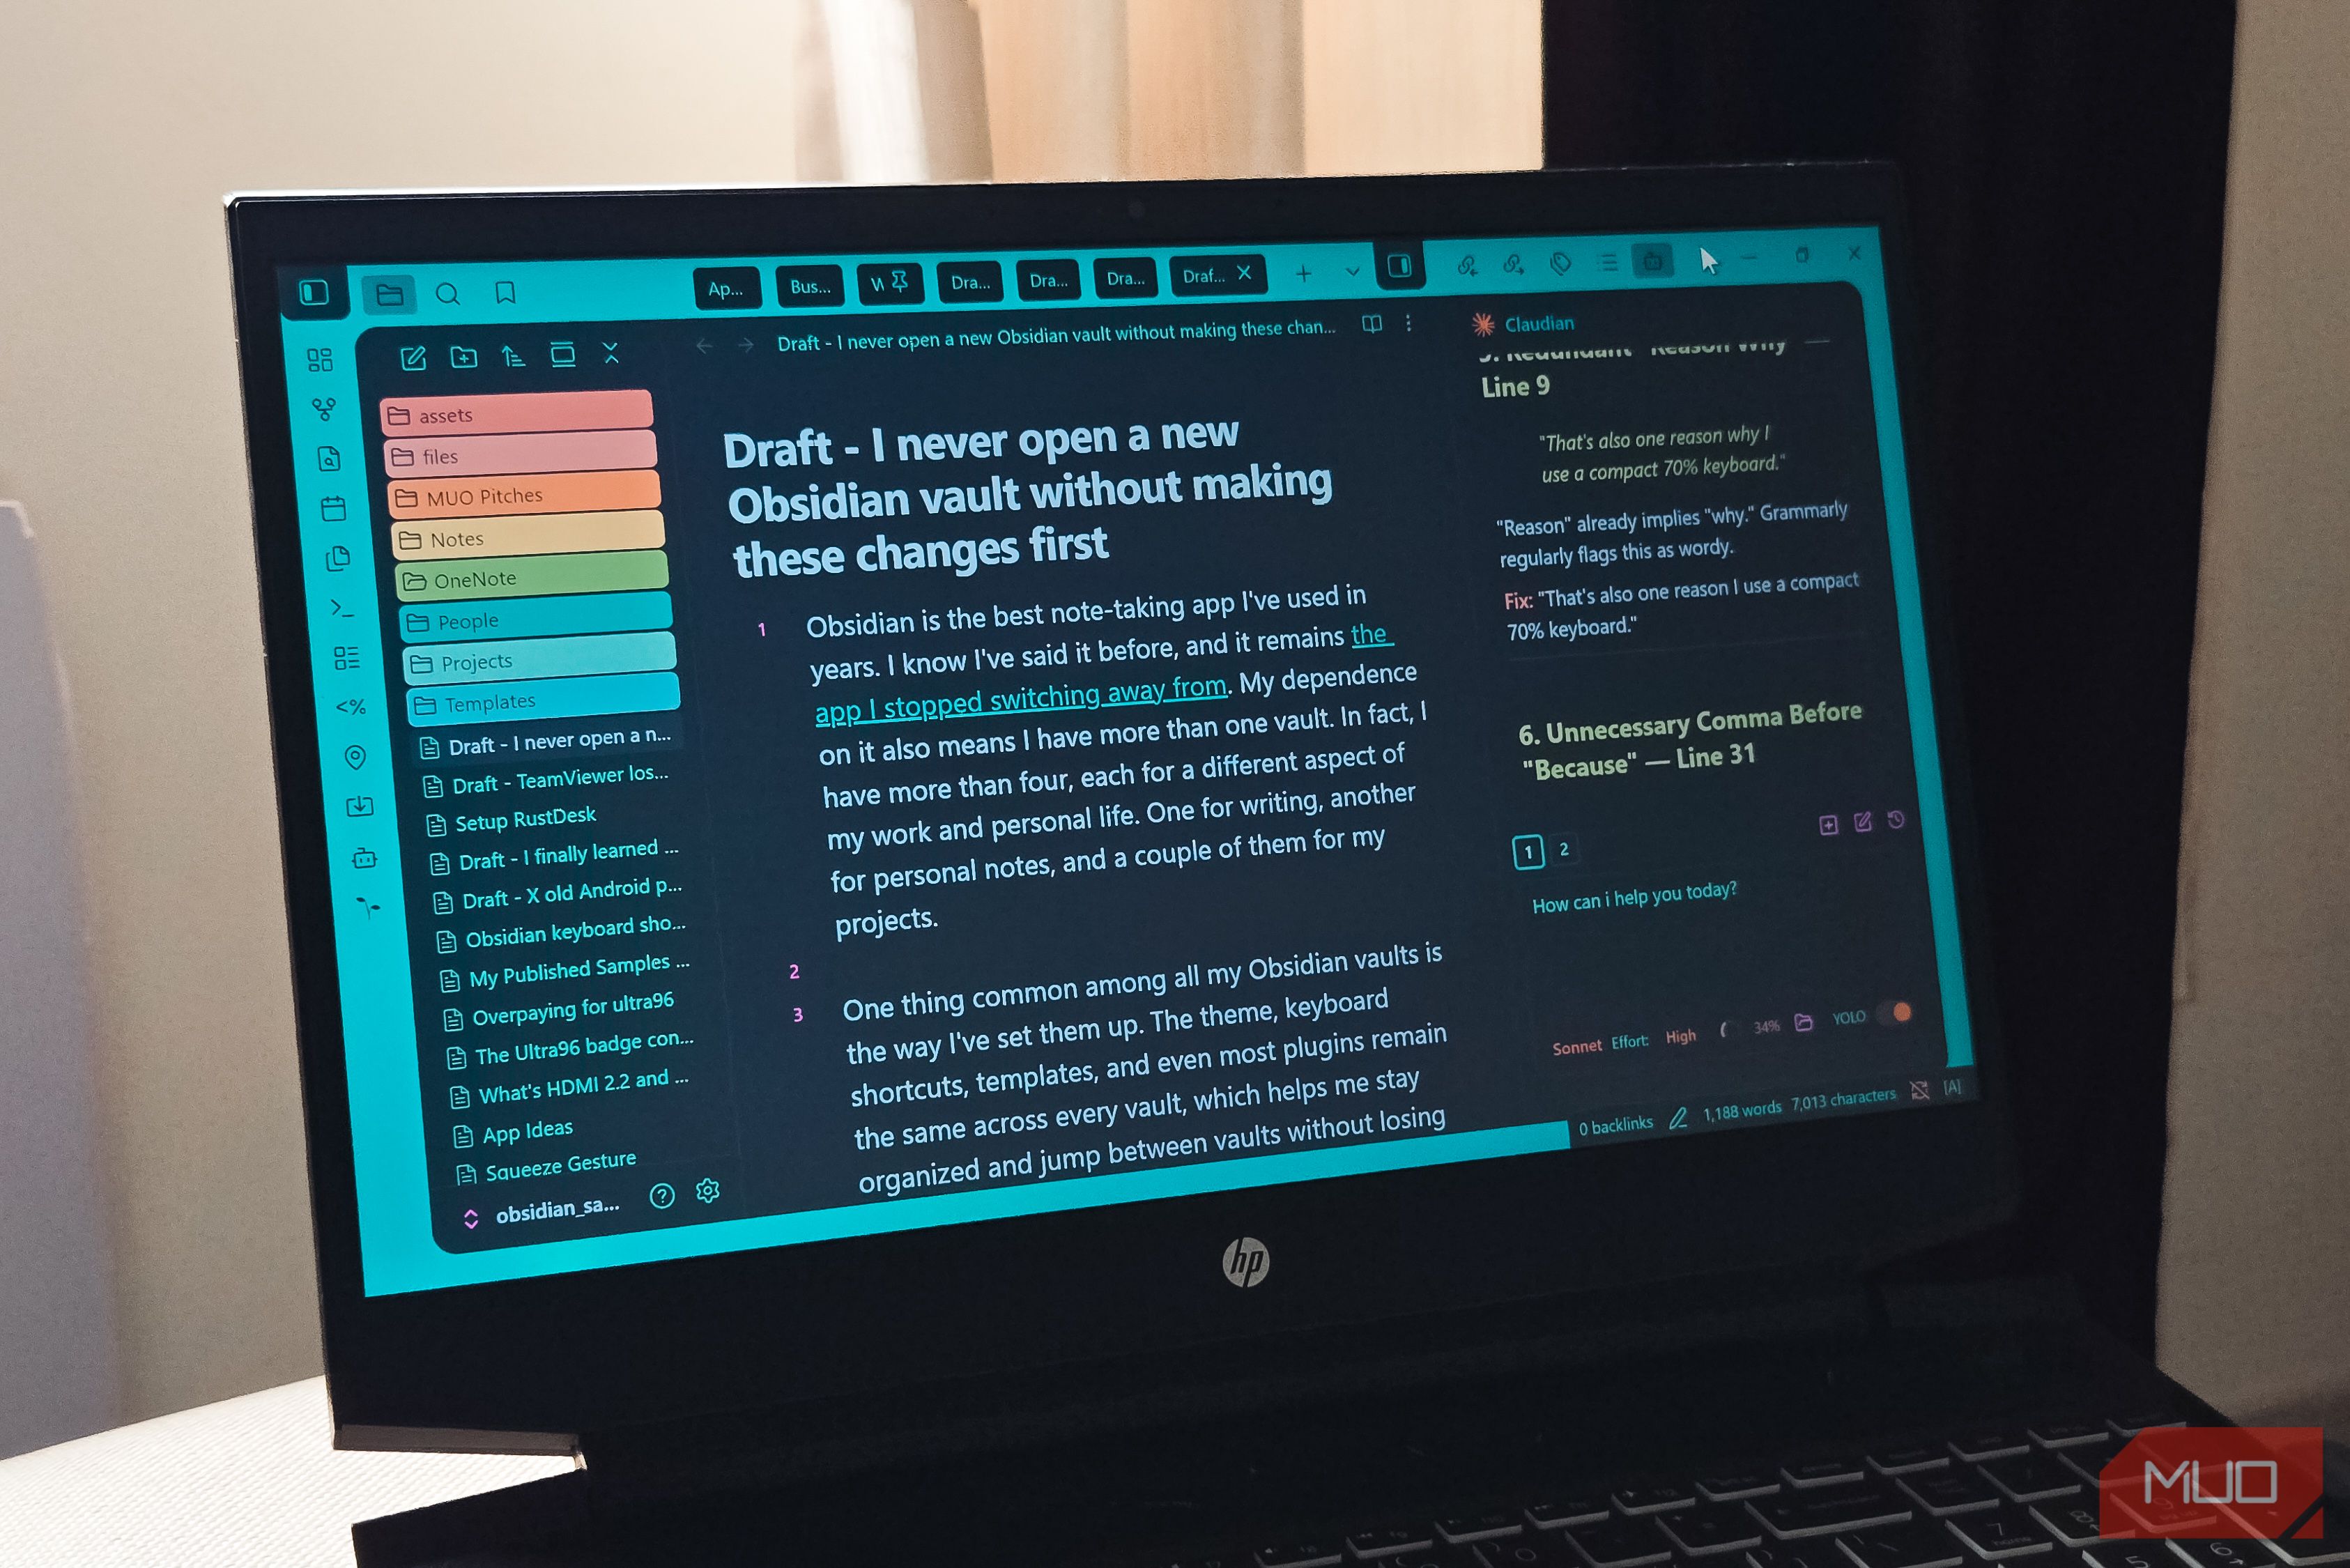
Step 2: Select and Apply a Custom Theme
The default Obsidian theme is functional, but a personalized theme can make your workspace more inviting and enjoyable, encouraging you to open the app more often.
- Open Settings: Access the gear icon (Settings) in the bottom-left corner.
- Go to Appearance: In the Settings menu, click "Appearance" in the sidebar.
- Browse and Manage Themes: Under the "Themes" section, click "Manage" to open the theme browser.
- Install a Theme: Browse the popular themes or search for specific styles. The "AnuPpuccin" theme is a highly regarded option if you prefer a colorful yet clean aesthetic. Click "Install" and then "Use" to apply it.
- Install Style Settings Plugin (Recommended): After choosing a theme, install the "Style Settings" community plugin (see Step 4 for plugin installation details). This plugin unlocks additional customization options for many popular themes, allowing you to fine-tune accent colors, font sizes, and layout without needing to edit CSS directly.
Step 3: Configure Bookmarks for Quick Access
Bookmarks in Obsidian serve a different purpose than in web browsers; they provide immediate access to your most important and frequently used notes, keeping them front and center.
- Identify Key Notes: Think about notes you access almost daily, such as a task list, a current project brief, or an ideas scratchpad.
- Add a Bookmark:
- Using File Explorer: Right-click on any note in the file explorer sidebar and select "Bookmark."
- Using Command Palette: Press Ctrl + P (or Cmd + P) to open the Command Palette, then type "bookmark" and select "Bookmark current note."
- Access and Pin Bookmarks: Once bookmarked, notes appear in the "Bookmarks" panel in your sidebar. Drag and drop this panel to your preferred location (e.g., at the top of the left sidebar) and click the pin icon to keep it consistently visible.
- Tip: Keep your bookmarked list concise. A short, focused list ensures these bookmarks remain genuinely useful for quick access rather than becoming an ignored archive.
Step 4: Install Essential Community Plugins
Obsidian's true power lies in its extensive plugin ecosystem. However, too many plugins can slow your vault. Focus on installing only those that solve specific, recurring problems in your workflow.
- Open Settings: Click the gear icon (Settings).
- Go to Community Plugins: In the Settings menu, select "Community plugins" from the sidebar.
- Turn Off Safe Mode: If prompted, toggle "Safe mode" off to enable community plugins.
- Browse and Install Plugins: Click "Browse" to open the community plugins list. Search for and install the following recommended plugins:
- Obsidian Digital Garden: Ideal for publishing selected notes from your vault as a public website without using Obsidian Publish.
- Tasks: Integrate robust task management directly into your notes, allowing you to track to-dos with due dates and filters.
- Quick Switcher++: An enhancement for the default Quick Switcher, enabling searches by headings and symbols within notes, invaluable for large vaults.
- Markdown Table Editor: Simplifies creating and editing Markdown tables visually, preventing common formatting headaches.
- Obsidian Git: Provides automatic, scheduled backups of your vault to a Git repository, offering version history without manual intervention.
- Claudian: Integrates Claude AI directly into Obsidian for brainstorming, drafting, and idea generation, keeping your AI interactions within your note-taking environment.
- Enable Plugins: After installation, go back to the "Community plugins" section in settings and toggle on each newly installed plugin to activate it.
Tips for a Seamless Workflow
- Consistency is Key: Applying these consistent settings across all your vaults fosters familiarity, allowing you to switch contexts without losing rhythm.
- Tailor to Your Needs: While these are popular recommendations, customize them further based on your specific use cases, whether for writing, project management, or research.
- Review Periodically: As your workflow evolves, periodically review your hotkeys, themes, bookmarks, and plugins. Remove what's no longer useful and add new tools as needed.
Next Steps
With your new vault configured, you're ready to dive into content creation. Start by creating a few core notes, experiment with your new shortcuts, and explore the functionalities of your installed plugins. Consider integrating a daily note practice or developing a personal note-linking strategy to maximize Obsidian's potential.
FAQ
Q: Can I apply these initial changes to an existing Obsidian vault?
A: Absolutely! While this guide focuses on setting up a new vault, all the steps—configuring hotkeys, changing themes, adding bookmarks, and installing plugins—can be applied to any existing Obsidian vault at any time. The process is identical; simply open your desired vault and follow the steps.
Q: What should I do if a plugin I installed causes issues or slows down my vault?
A: If you suspect a plugin is causing problems, the first step is to disable it. Go to Settings > Community plugins, find the problematic plugin, and toggle it off. If the issue resolves, you can then try uninstalling it or searching for an alternative. It's good practice to install plugins one by one and test them to identify any conflicts early on.
Q: How can I find more themes or plugins beyond the ones recommended here?
A: Obsidian's community is very active! To discover more themes, go to Settings > Appearance > Themes > Manage and browse the extensive list. For plugins, navigate to Settings > Community plugins > Browse. Both sections allow you to sort by popularity or search by keywords to find tools that fit your unique needs. Many users also share their favorite setups and discoveries on forums and subreddits dedicated to Obsidian.
Related articles
Upgrade Your HDMI Cables for Peak 4K TV Performance
Ensure your new 4K TV delivers its best picture and features by upgrading to the correct HDMI cables. Learn to identify outdated cables, understand modern HDMI standards, troubleshoot common issues, and select the right cables for peak performance in simple, actionable steps.

Phone Privacy Settings: Your Digital Fortress Blueprint
Quick Verdict ZDNet's advice on managing phone privacy settings isn't just a suggestion; it's a critical blueprint for anyone serious about digital security. By highlighting seven core areas, the article provides

Your Brain's Bandwidth: Managing Information Overload in a Globalized
As software developers, we're constantly managing information streams: Jira tickets, pull requests, Slack messages, documentation, and the ever-present churn of new frameworks and libraries. We understand deeply the

Signal's Whittaker: AI Chatbots Are 'Not Your Friends
Signal President Meredith Whittaker warns that AI chatbots "are not your friends," lacking consciousness or sentience, and pose significant privacy risks. She critiques the vision of deeply integrated AI assistants, arguing their need for pervasive personal data access constitutes a "backdoor" for secure platforms like Signal.
Control Your Phone's Hidden Location Tracking Beyond GPS
Learn how your phone tracks your location using Wi-Fi, cellular, IP, and Bluetooth, even with GPS off. This guide provides actionable steps to review app permissions, disable system-wide location, and manage scanning settings to enhance your digital privacy.
Demystify Storage: Why a DAS Might Be Better Than a NAS for You
Deciding on the right storage solution can feel like navigating a maze of acronyms and technical specifications. Two common options are Network-Attached Storage (NAS) and Direct-Attached Storage (DAS). While NAS often